

Blog · October 12, 2026
How to Clear Rental Trash Without Losing Your Deposit
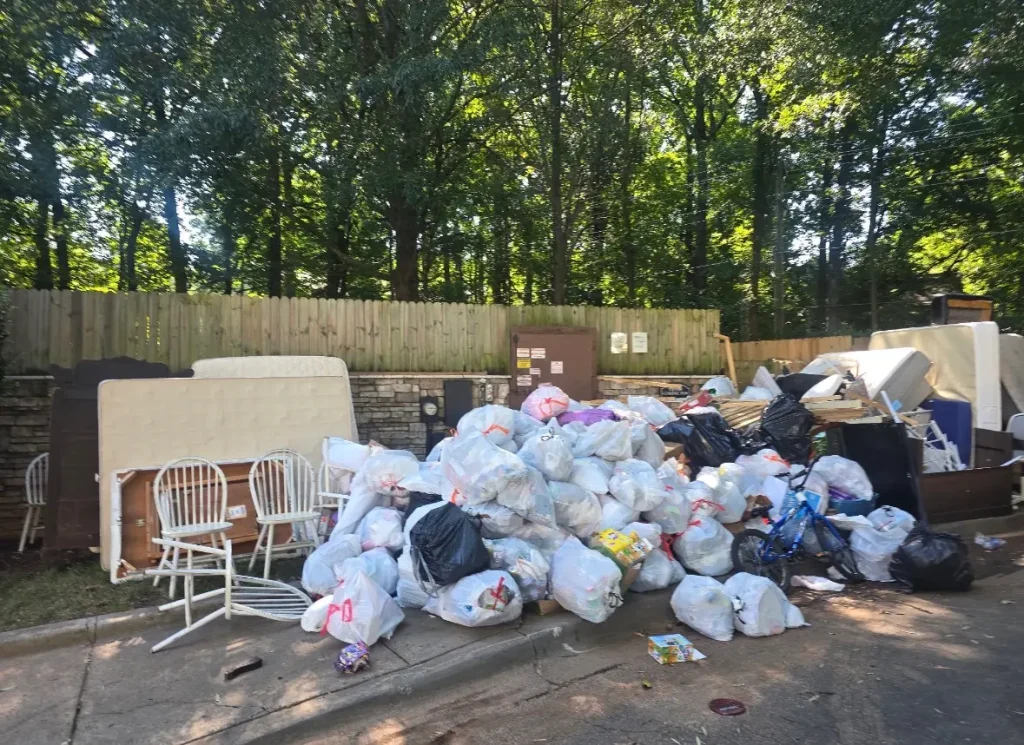
That last week in a rental gets messy fast. Boxes multiply, the garage coughs up old furniture, and somehow there is always one mattress nobody wants to claim. Knowing how to clear rental trash the right way can protect your security deposit, keep your landlord happy, and save you from making three sweaty trips to the dump.
The goal is not to make the place look temporarily empty. It is to leave it clean, clear, and ready for the next tenant without creating a curbside junk pile that earns you a fee. Here is the no-nonsense way to get it done.
Start With Your Lease and Move-Out Rules
Before you bag a single thing, check your lease, move-out checklist, and any building rules. Landlords and property managers often spell out where trash can go, what pickup days apply, and whether tenants can use dumpsters. Those rules matter more than most renters realize.
A shared apartment dumpster is not automatically a free-for-all for couches, mattresses, TVs, or renovation debris. Many communities charge the property for overflow or prohibited items, then pass that charge right back to the tenant who left them. A single abandoned sectional can cost a lot more than arranging removal before move-out.
If you are unsure, ask the landlord or property manager two simple questions: What can go in the regular trash, and where should bulky items go? Get the answer in writing if possible. It is a small move that can prevent a big deposit dispute later.
Sort Rental Trash Before You Haul It
Do not treat every unwanted item like garbage. A quick sort makes disposal cheaper, faster, and more responsible. Make separate areas for regular household trash, donations, recyclables, bulky junk, and items that need special handling.
Regular trash includes bagged household waste, broken small items, food containers, and clutter with no resale or donation value. Keep bags tied securely and avoid overstuffing them. A ripped trash bag on carpet or stairs is a rotten final-day surprise.
Donation candidates might include clean furniture, usable kitchenware, clothing, toys, and working household goods. Be realistic, though. A stained sofa, broken dresser, or mattress that has seen better decades is usually junk, not a donation. Wishful thinking can turn into a last-minute scramble.
Recyclables may include cardboard, paper, cans, bottles, and certain metal items, depending on your local program. Break down boxes as you go. They take up far less room, and they make the place look under control when the final walkthrough happens.
For large pieces like couches, bed frames, appliances, old TVs, exercise equipment, and piles of garage clutter, a professional junk pickup is often the cleanest answer. You get the space back without borrowing a truck, lifting a refrigerator, or guessing where each item belongs.
How to Clear Rental Trash Room by Room
A room-by-room plan keeps the job from feeling like a full-contact sport. Start with areas you use least, such as storage closets, the attic, basement, garage, or patio. Those spots usually hide the most junk and take longer than expected.
Next, clear bedrooms and living areas. Pack what is moving with you first, then decide what remains. That order matters. When you remove junk before packing is finished, good belongings can get tossed by accident or buried under bags.
Save the kitchen and bathrooms for late in the process because you will still need them during move-out. Dispose of expired food and empty containers as close to your departure as practical. Never leave food in the fridge, cabinet crumbs in the pantry, or a mystery bag under the sink. That is how a clean-looking rental becomes a pest problem.
As each room is emptied, do a second pass. Open drawers, look behind doors, check under beds, and inspect shelves. Tenants commonly forget items in the laundry room, the top of closets, outdoor storage boxes, and behind appliances.
Know What Needs Special Disposal
Some items should never be tossed in regular trash or left beside a dumpster. Paint, chemicals, motor oil, propane tanks, batteries, fluorescent bulbs, and certain electronics can require specific disposal methods. These materials can leak, create fire risks, or violate local disposal rules.
Appliances and electronics deserve a little extra attention too. Refrigerators, freezers, televisions, and monitors are bulky, awkward, and not always accepted through normal curbside service. If an appliance still works, it may be reusable. If it does not, arrange a removal option that handles it responsibly.
Mattresses are another frequent move-out headache. They are hard to maneuver through stairwells, often rejected by donation centers, and cannot simply be folded into a trash bin. Plan ahead instead of leaving one by the curb and hoping for the best.
If you are clearing construction debris after a tenant repair or small renovation, keep materials like drywall, lumber, tile, carpet, and fixtures separate from household bags. Heavy debris changes the hauling plan and may affect disposal costs.
Avoid the Move-Out Mistakes That Cost Money
The biggest mistake is waiting until the final day to deal with bulky junk. Pickup schedules fill up, donation sites may not accept your items, and your friend with a pickup truck may suddenly be very busy. Give yourself a few days of breathing room.
Another mistake is assuming the landlord will handle whatever you leave behind. They will handle it, sure – then they may deduct cleaning, hauling, labor, and administrative fees from your deposit. Those charges can be far higher than arranging removal yourself.
Avoid curb dumping, too. Leaving furniture outside without approval can violate neighborhood, HOA, apartment, or city rules. It also creates an eyesore for neighbors and a tripping hazard for anyone walking by. Nobody wants their old recliner becoming the block’s temporary landmark.
Finally, take photos after everything is removed and the unit is cleaned. Photograph every room, closets, appliances, floors, outdoor areas, and any approved trash location. Timestamped pictures will not solve every disagreement, but they give you proof of the condition you left behind.
When Hiring a Junk Hauler Makes Sense
DIY disposal works when you have a few bags, a reliable vehicle, time to spare, and a nearby disposal option that accepts what you have. It gets less practical when the load includes furniture, mattresses, appliances, demolition debris, or a whole garage cleanout.
A hands-on junk removal crew can be especially useful for rentals with stairs, tight hallways, long carries, or a move-out deadline that is breathing down your neck. The crew does the lifting and loading, while you focus on cleaning, keys, utilities, and the dozen other things that come with changing addresses.
Ask about pricing before booking. Volume-based pricing is usually straightforward for mixed rental trash, but labor-intensive situations can affect the total. Extra stairs, long walks from the unit, heavy items, boxing or bagging work, and unusually dense debris may cost more. A reputable company should explain that upfront, not spring it on you after the truck is loaded.
For renters, landlords, and property managers around Charlotte, Junk Punk can remove unwanted furniture, appliances, mattresses, bagged trash, yard debris, and other move-out clutter with fast scheduling and hands-on loading. That means less junk sitting around and fewer reasons for a property manager to raise an eyebrow.
Give Yourself a Clean Finish
The best time to clear rental trash is before the final cleaning, not after it. Once the junk is gone, vacuuming, wiping down cabinets, cleaning appliances, and checking for damage becomes much easier. You can see the rental as your landlord will see it: empty, clean, and ready for a fresh start.
Put the removal date on your move-out calendar now, especially if you have bulky items or a packed garage. Future you will be glad the old couch is gone, the deposit is protected, and the only thing left to carry is the keys.